I love changes around me! I am always trying to find new and inspiring things and ideas. When I find one, there is no such strength on earth that could stop me. My M. is telling me that my second name should be RENOVATION. Well, let’s agree there is a little seed of truth in it. ;)
I have seen many hand painted wall papers on Pinterest, but this one on Karolina’s blog stole my heart. After the last Christmas season, when had a couple of free days I decided to make the plan real.
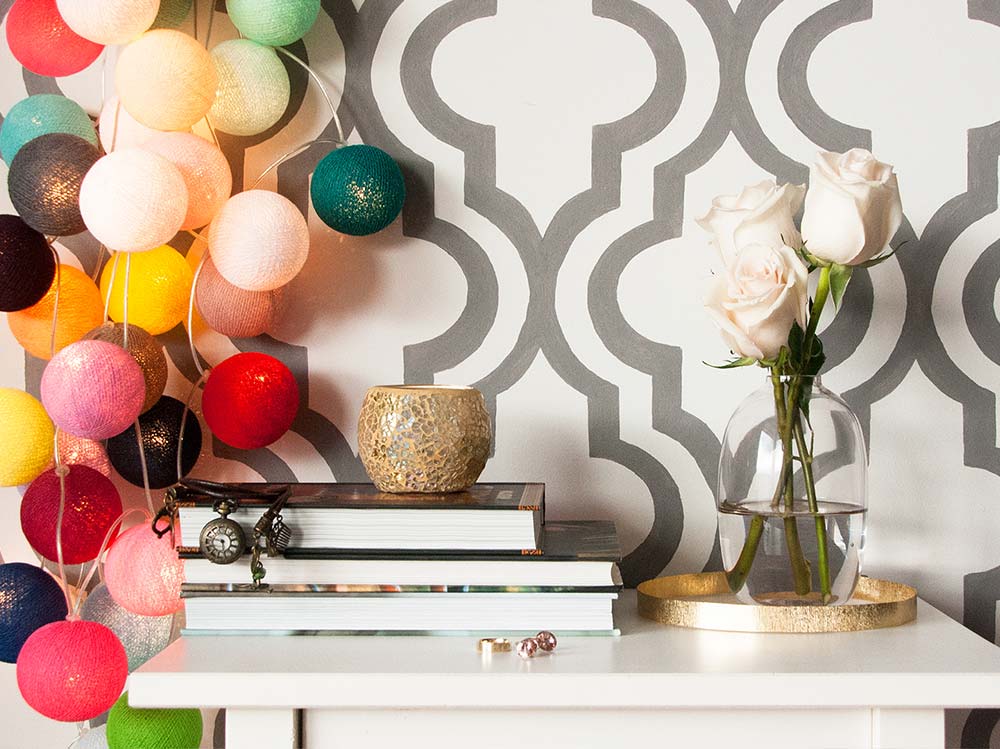
The result exceeded my expectations! The wall looks simply AMAZING! See by yourself: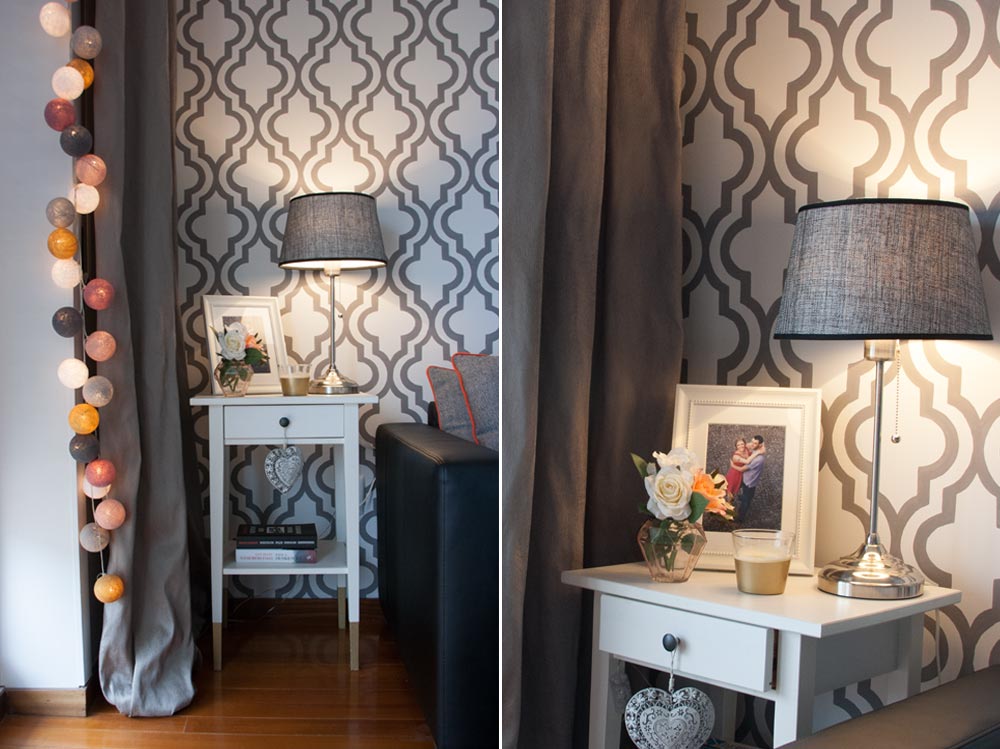
I love the idea and love the result! It’s beautiful, simple and cheap! To make it I used some rest of the paint, which left after paining the fireplace wall. And believe me – you can’t go wrong with it!
So, how to do it?
You will need:
1. Plastic and paper tape (only if you want to protect the floor),
2. Paint in the color you like (I used a bit darker to have a stronger contrast with an almost white wall, but you can of course use a bit lighter one),
3. Pattern template* (to trace on the wall),
4. Small paint brushes,
5. Pencil or white crayon,
6. Little glass or jar for the paint.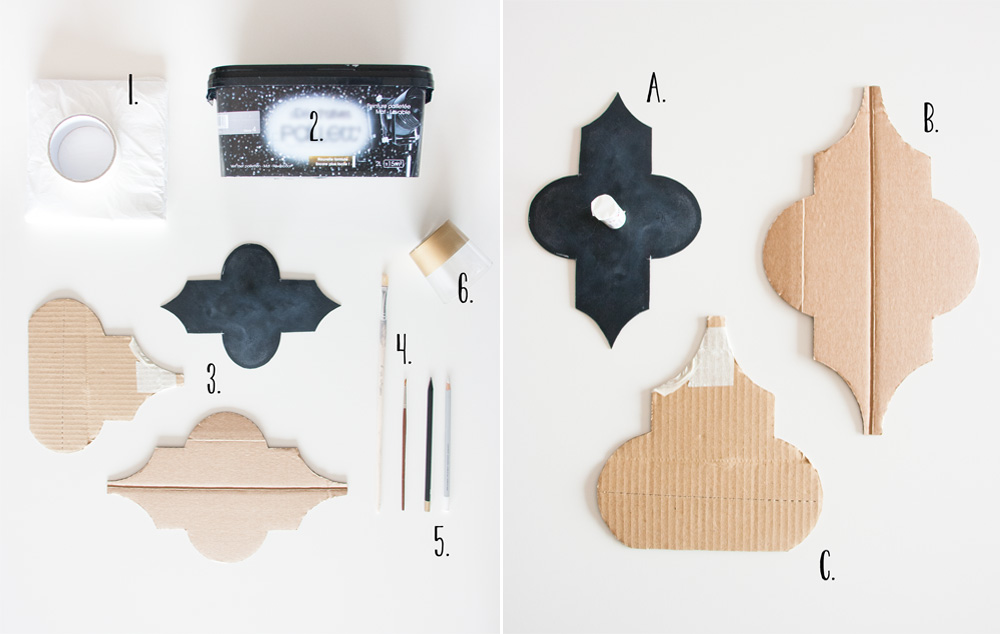
*PATTERN TEMPLATE
You can make it by yourself cutting it in a carton box or plastic folder. Choose any shape you want or use MY TEMPLATE – it’s ready to print.
Print it, cut it, trace it onto cardboard and cut the final pattern.
As you can see on the right photo above I cut 3 shapes, but 2 would be absolutely enough.
Pattern A I was using to make a smaller shapes (inside), pattern B I was using to make a bigger shapes (outside). Pattern C I was using everywhere where I needed to draw half of the shape – next to the ceiling, floor or in the corner. It is not essential, it was just easer to fold it on half.
Ready?
STEP 1 – trace the pattern onto the wall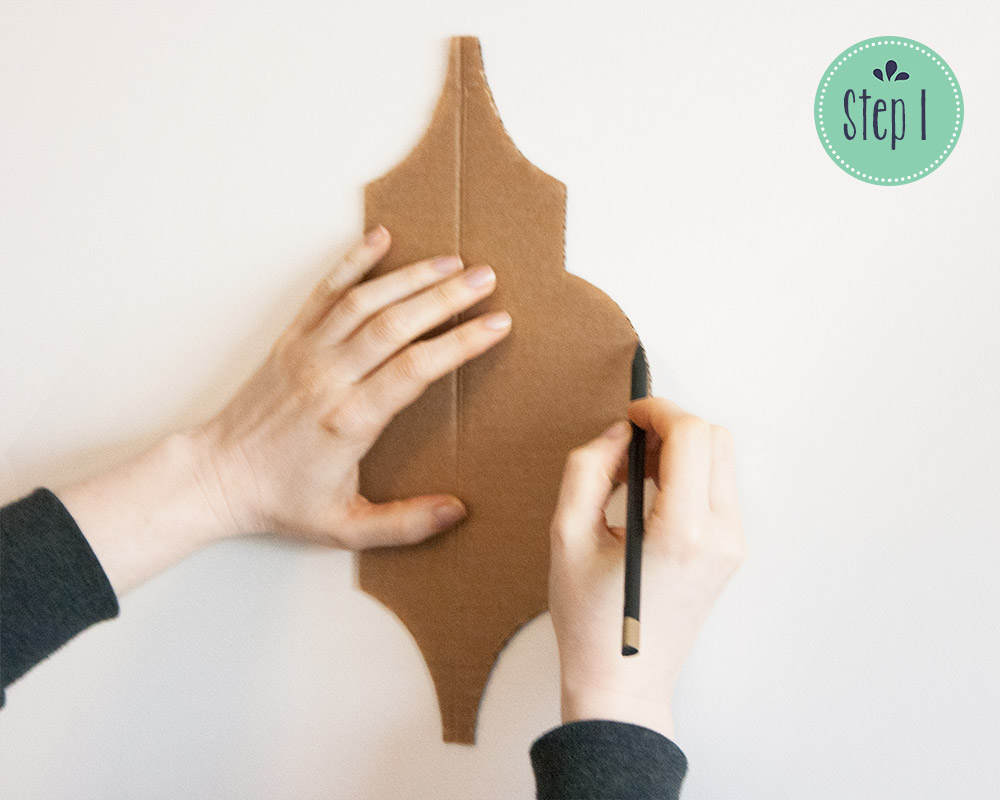
You can use a pencil or white crayon. Here you can see how I was using my patterns: first I traced the bigger shape (outside) and later the smaller one (inside). Maybe it doesn’t look like it, but it was really easy!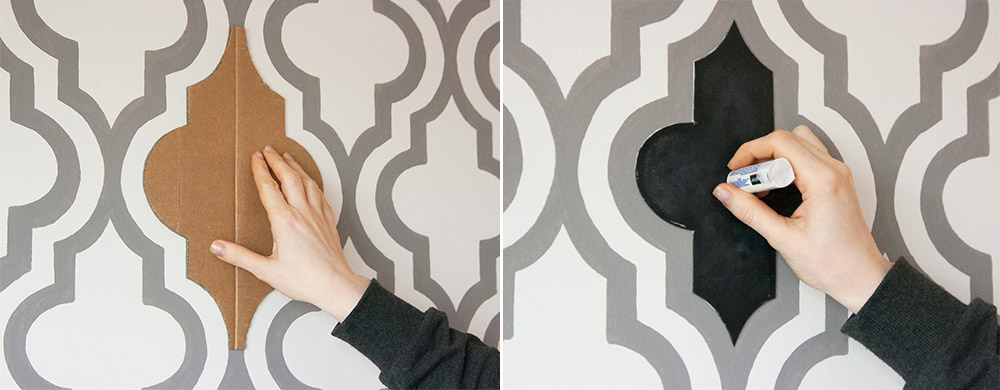
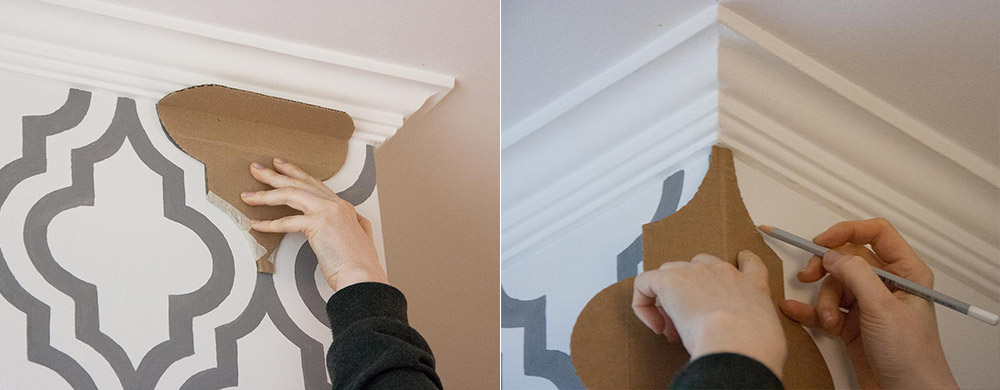
STEP 2 – follow the lines with a small paint brush
Believe me it really does not have to be perfect! Don't let the fear of imperfection stop you from doing this! Beside this – remember to make some mistakes, because no one will notice that you painted it by yourself! :D
STEP 3 – enjoy the view!
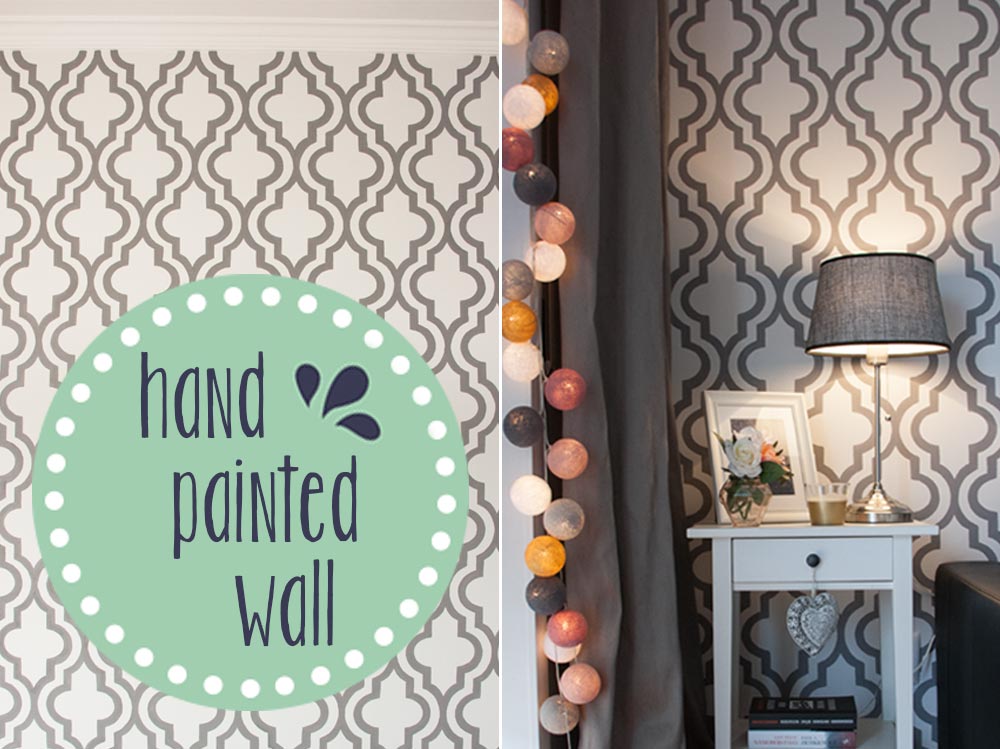

I love my new wall! It's more cozy in the room now. On this wall I plan to make a photo/poster gallery, but about this I will tell in a different post in the future.
And what do you think? Are you ready for your own, handmade wall paper? If yes, show off your effects – here or on our Facebook. I will be waiting for your comments!
For more inspiration, check out our Facebook e Instragram. Join us if you are looking for ideas for unusual interior!
If you need more information about garlands Cotton Ball Lights can check our FAQ.
